Instructor: Tom Igoe
Summary of the key points about the Arduino Nano 33 IoT
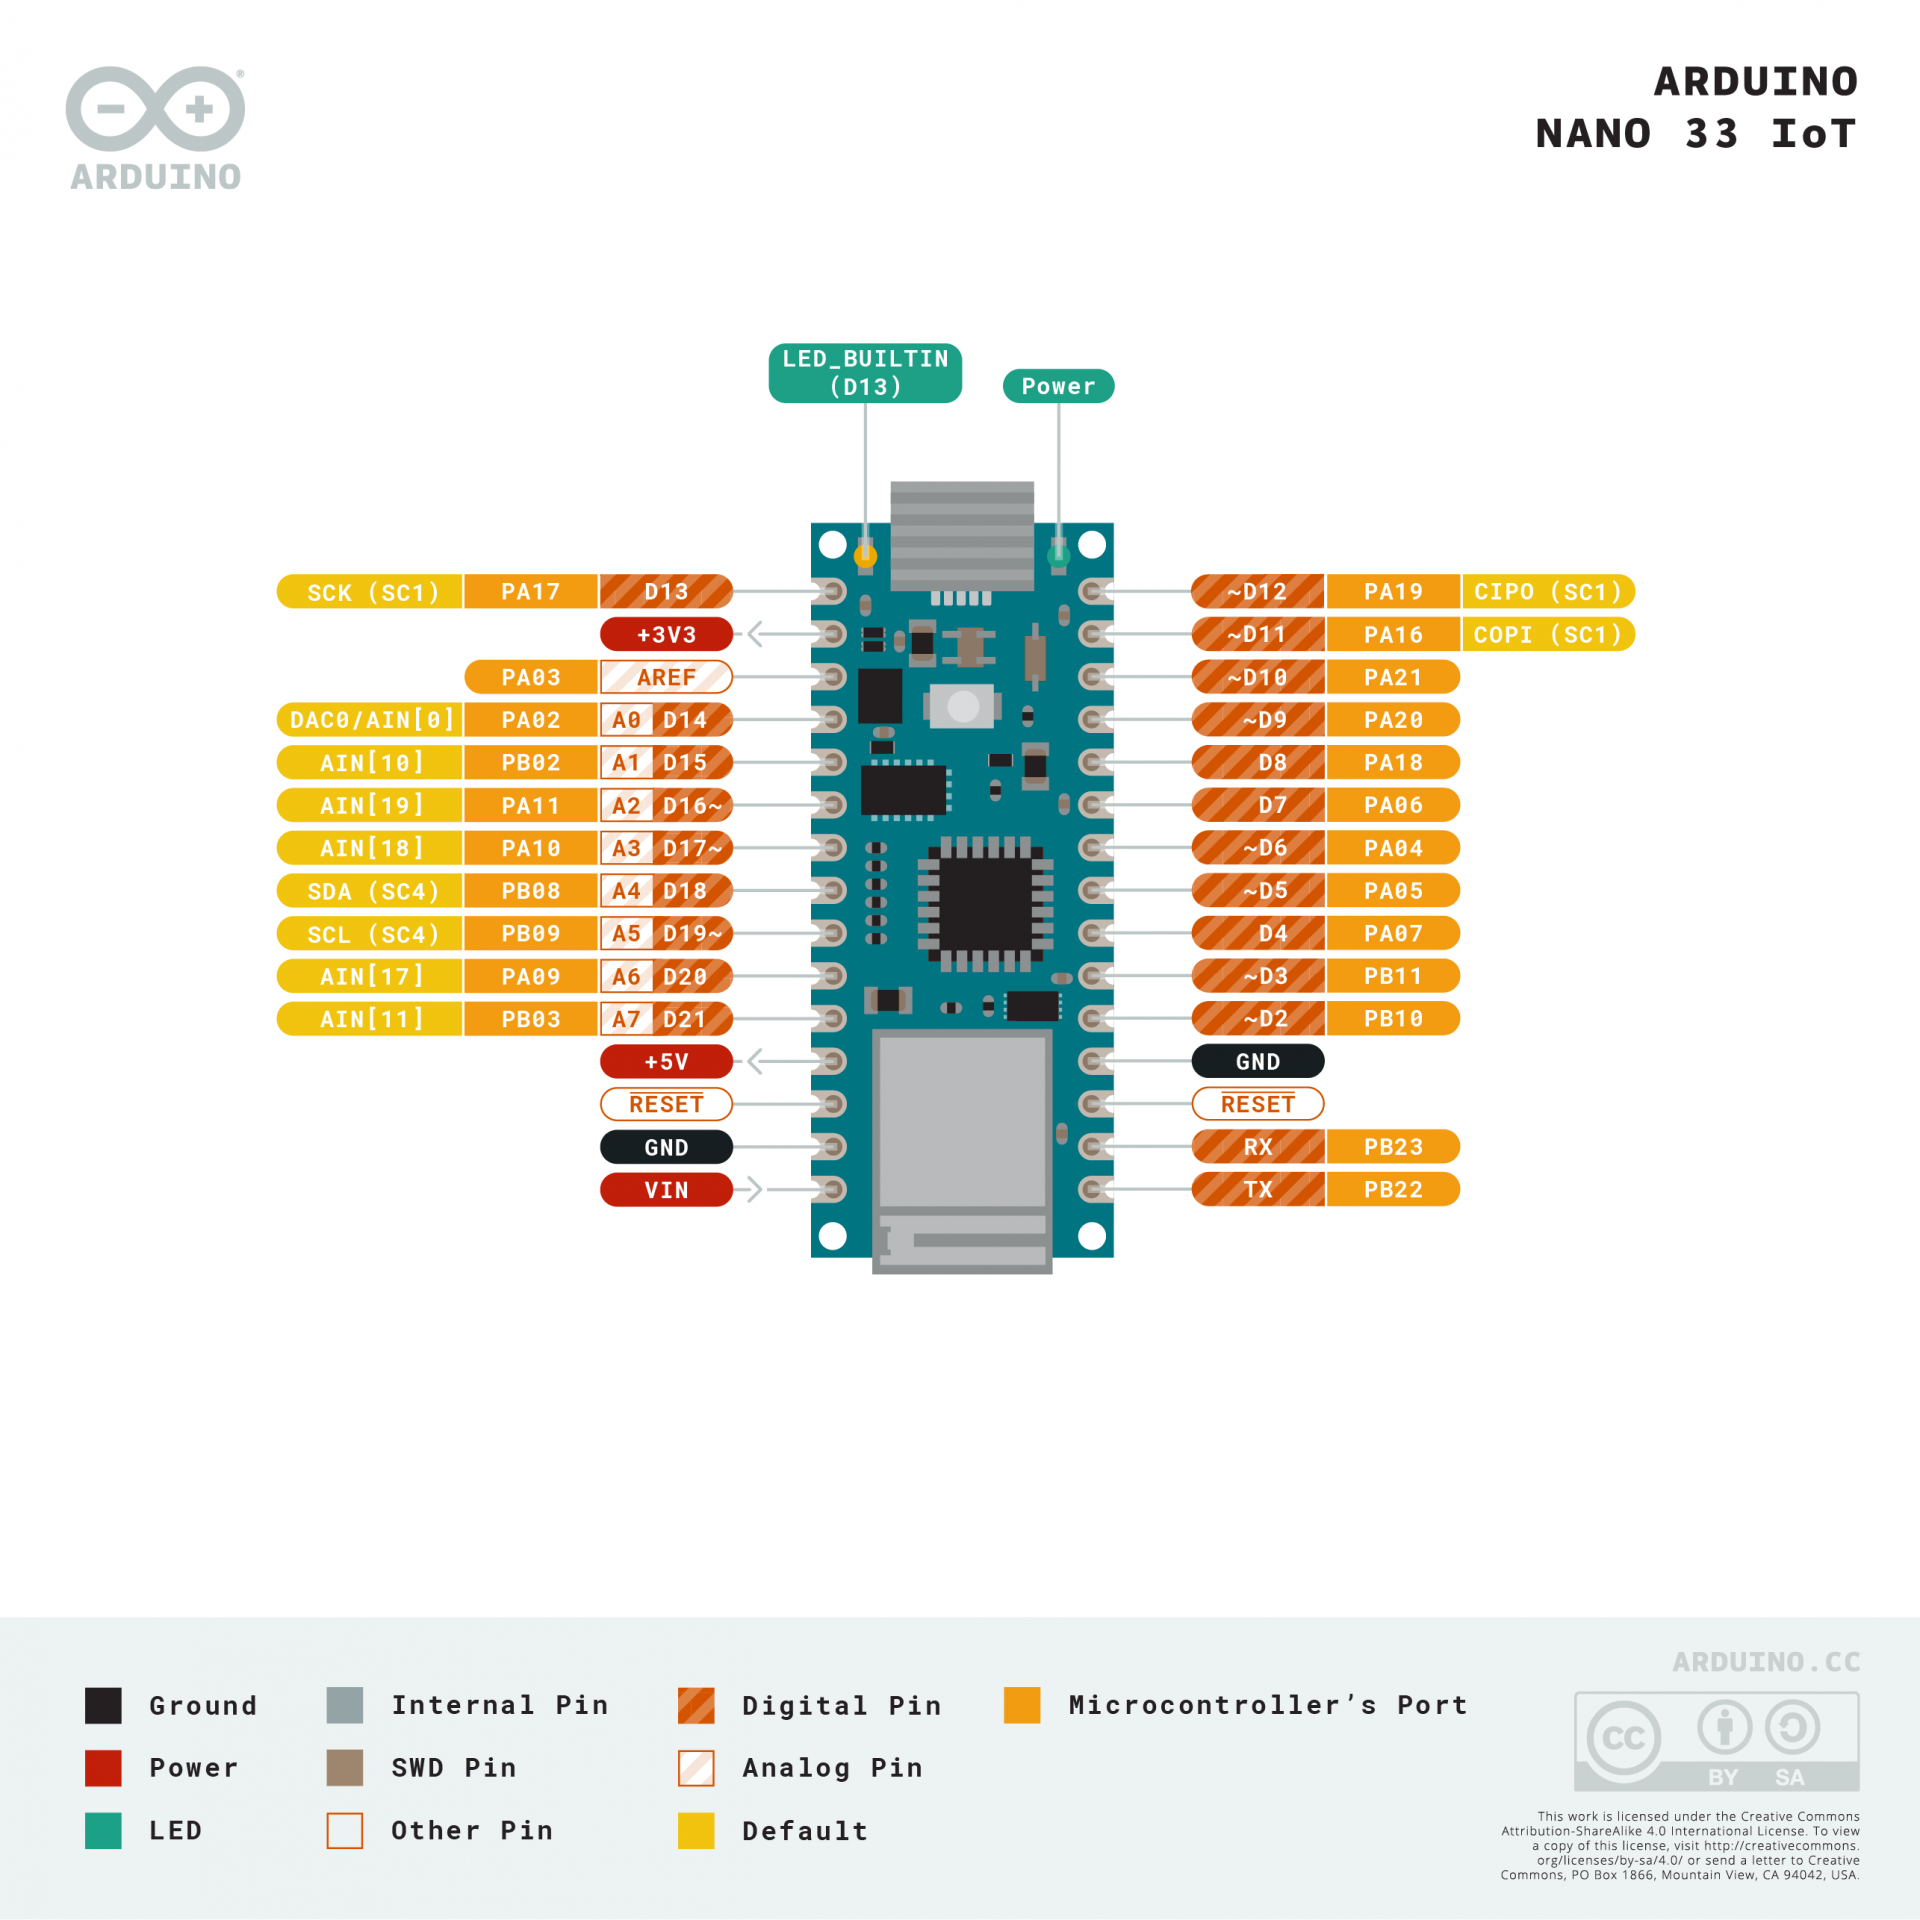
Form Factor and Pin Layout:
Based on the original Arduino Nano pin layout.
Dual-inline package (DIP) format with 30 pins arranged in a U shape.
Designed to fit on a solderless breadboard, ideal for compact or handheld projects.
Offers 14 digital I/O pins and 8 analog input pins, totaling 22 digital I/O pins.
Power:
Operates on 3.3V, unlike the Arduino Uno which operates on 5V.
Can be powered via USB or through the Vin pin (up to 21V).
Offers a 3.3V output pin to power external components.
Wireless Connectivity:
Built-in Wi-Fi and Bluetooth Low Energy (BLE) via the u-blox NINA-W102 module.
Secure communication is supported through an onboard crypto chip.
Supported by the WiFiNINA and ArduinoBLE libraries for Wi-Fi and Bluetooth functionality.
Built-in Sensors and Features:
Includes a 6-axis Inertial Measurement Unit (IMU) with a 3-axis accelerometer and a 3-axis gyroscope for motion sensing.
Features a real-time clock (RTC) for time-keeping.
USB and Serial Communication:
USB-native, capable of operating as a keyboard, mouse, or MIDI device.
Contains a second asynchronous serial port on pins 0 and 1 for additional serial communication.
Handling and Usage:
If the board does not appear in the Arduino IDE, double-tap the reset button to enter bootloader mode.
The MicroUSB connector and Wi-Fi/Bluetooth antenna are delicate; handle the board carefully.
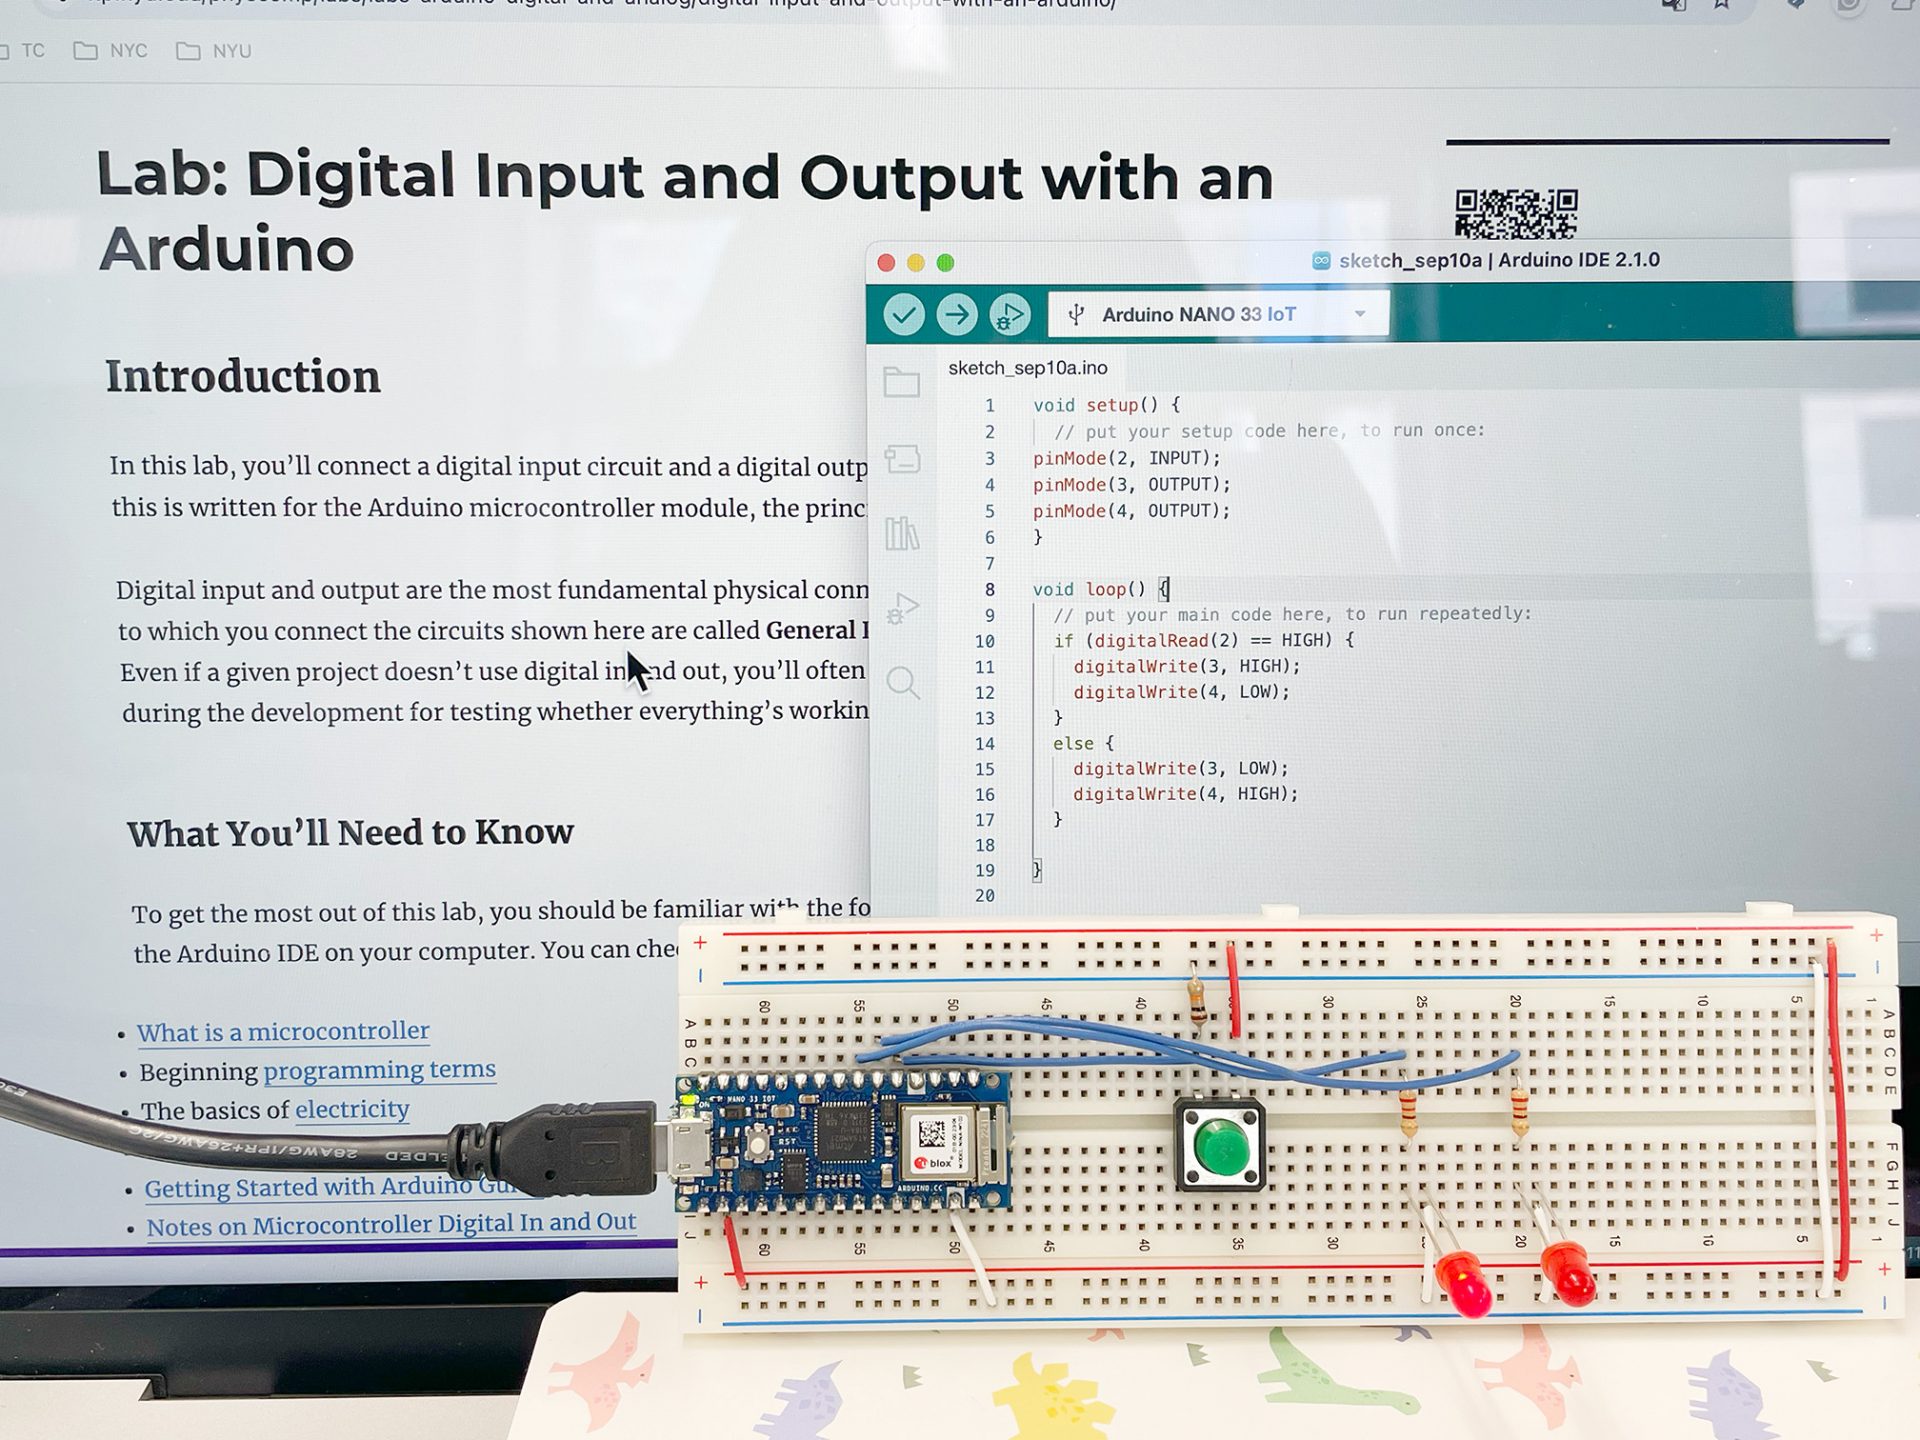
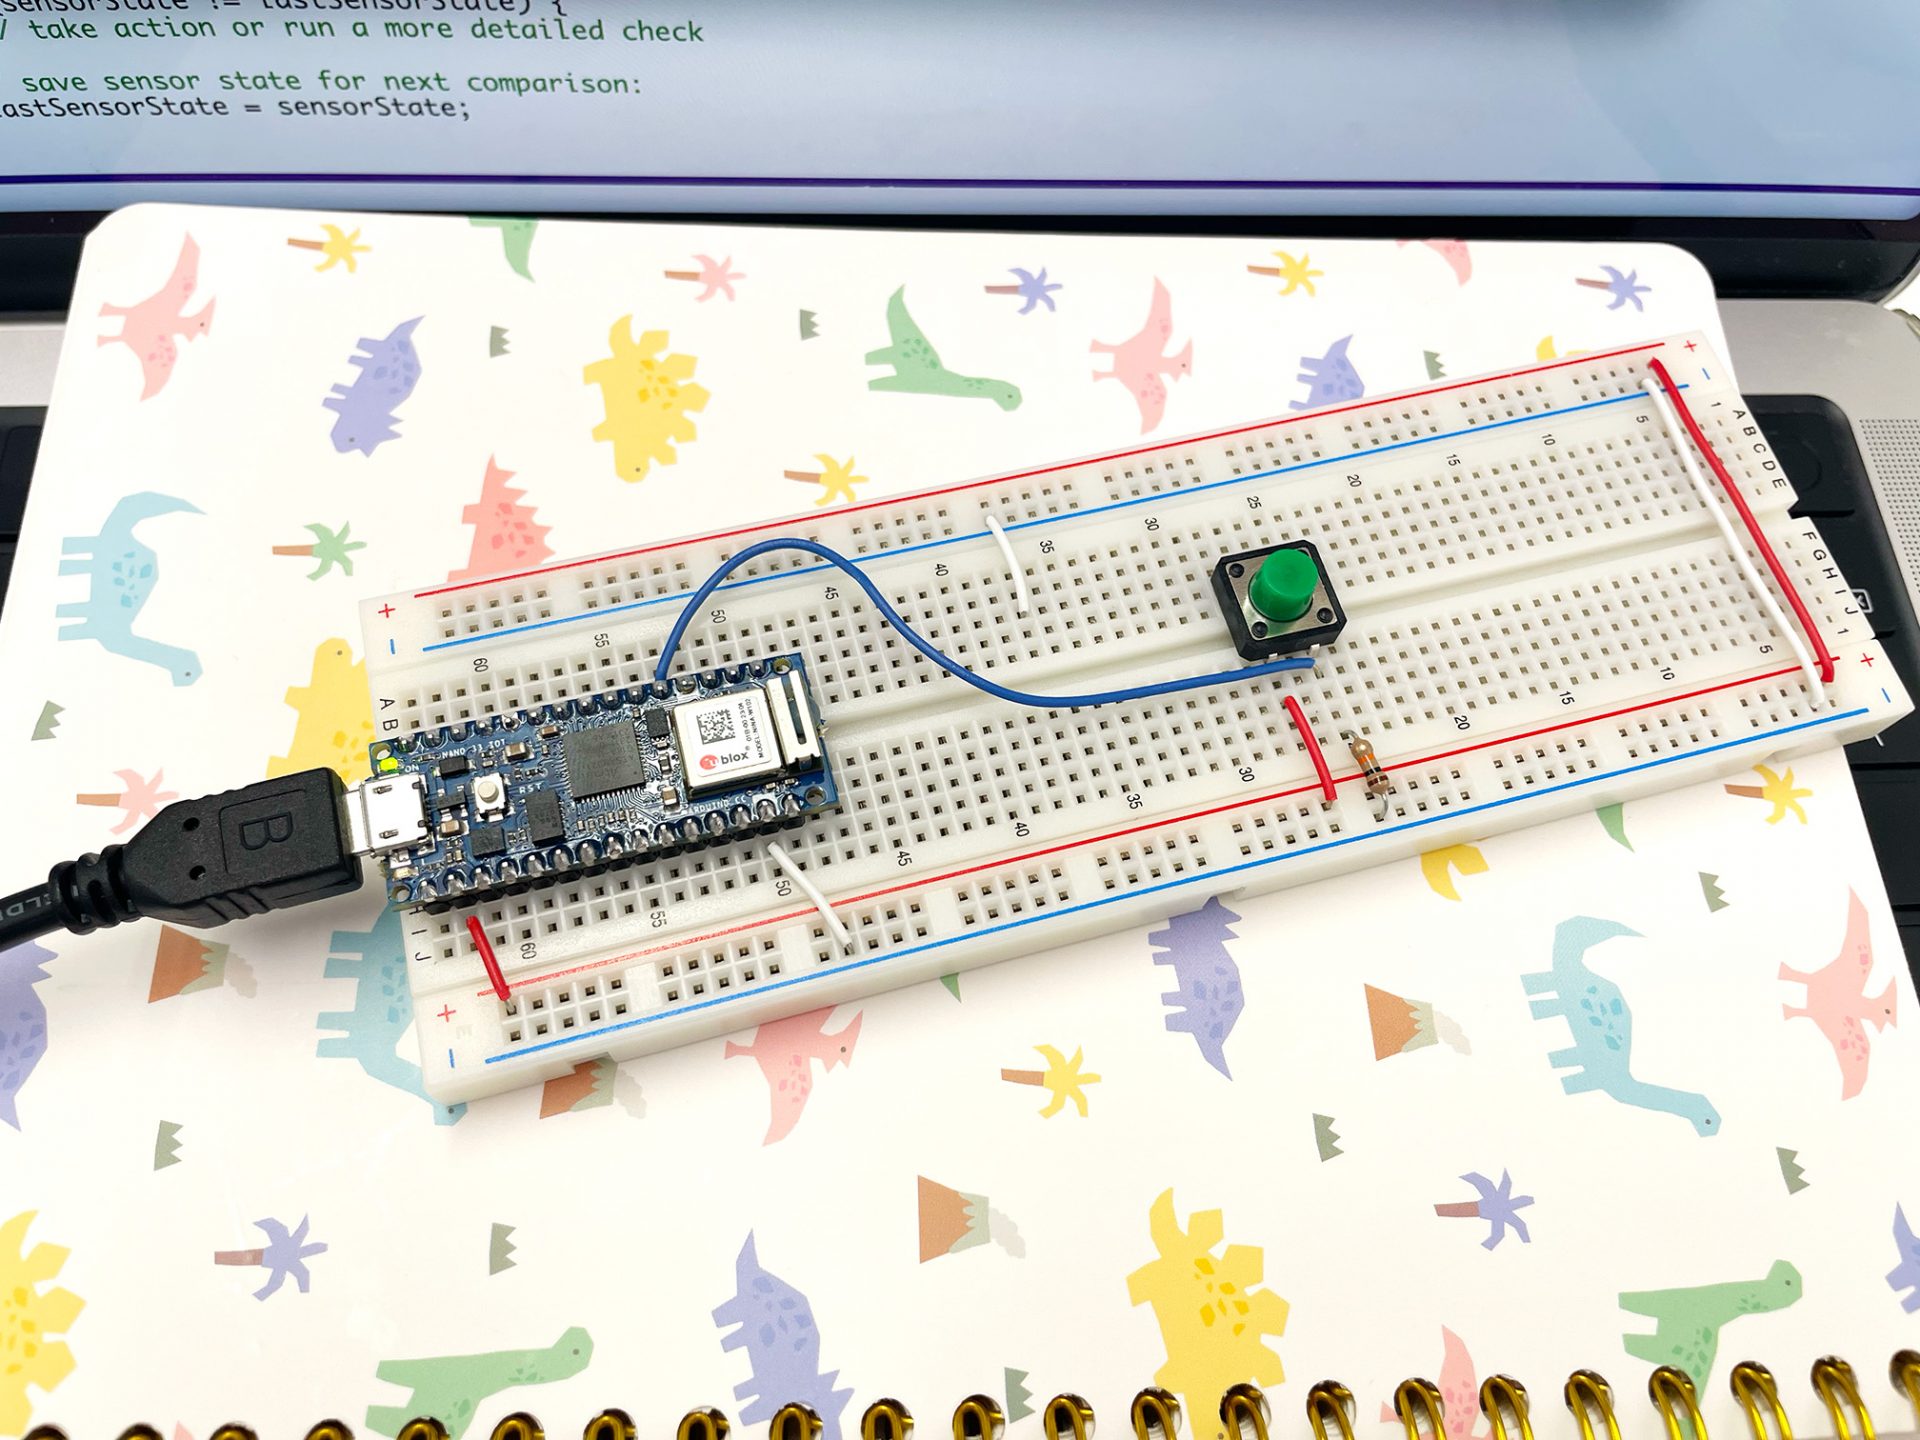
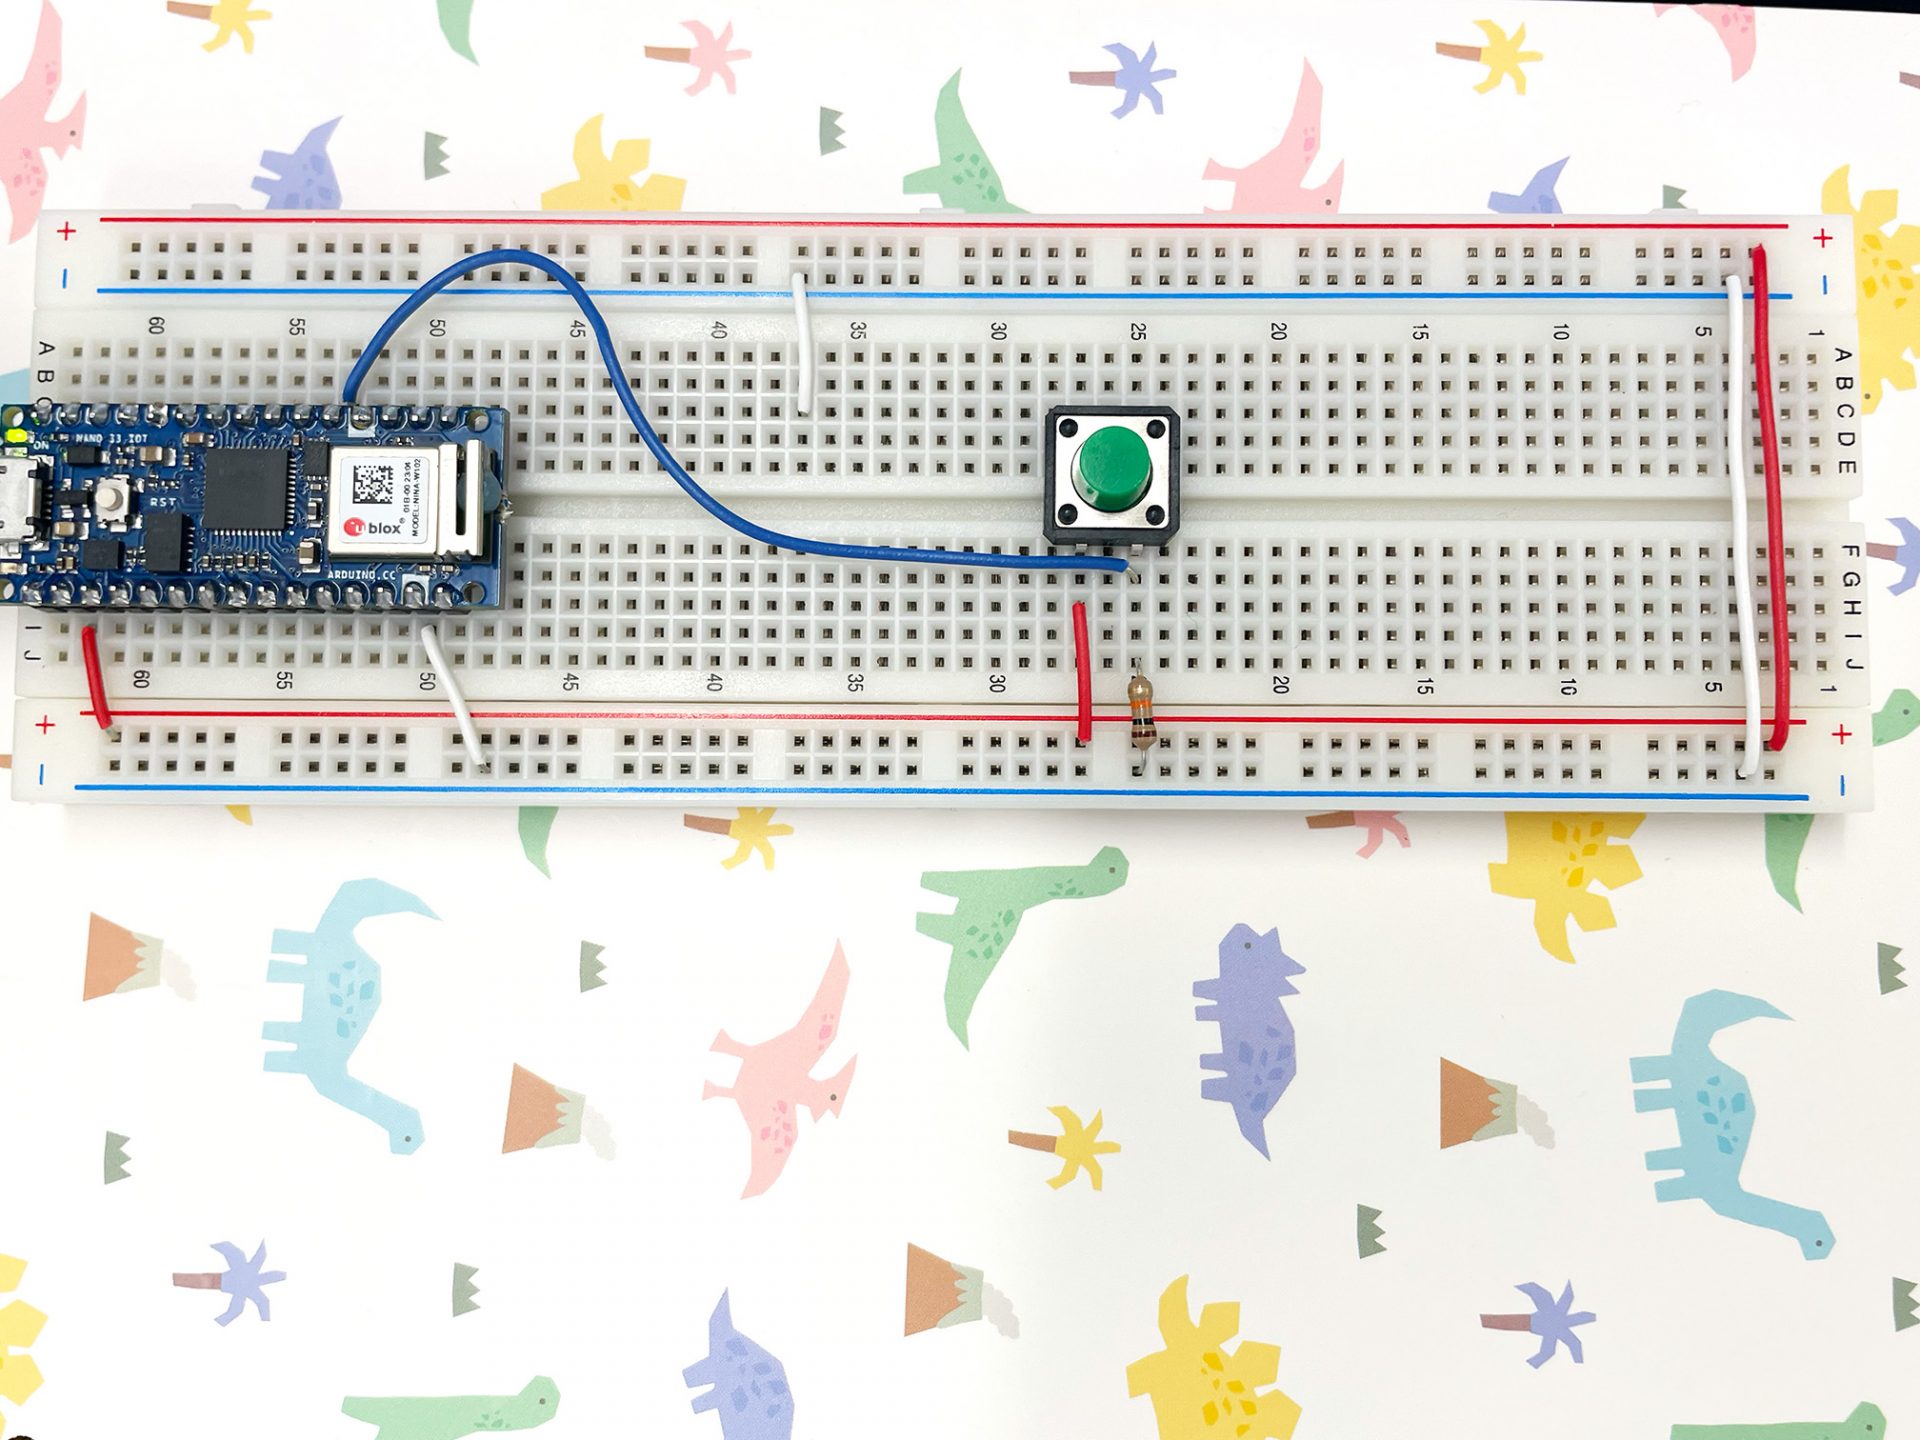
Full down resistors: Without the pulldown resistor, the digital input pin will behave unreliably due to floating voltage.

A circuit was built using an LED, a 220-ohm resistor, a 10k-ohm resistor, and a switch. Arduino code was then written to toggle LEDs on and off each time the push button is pressed and released.
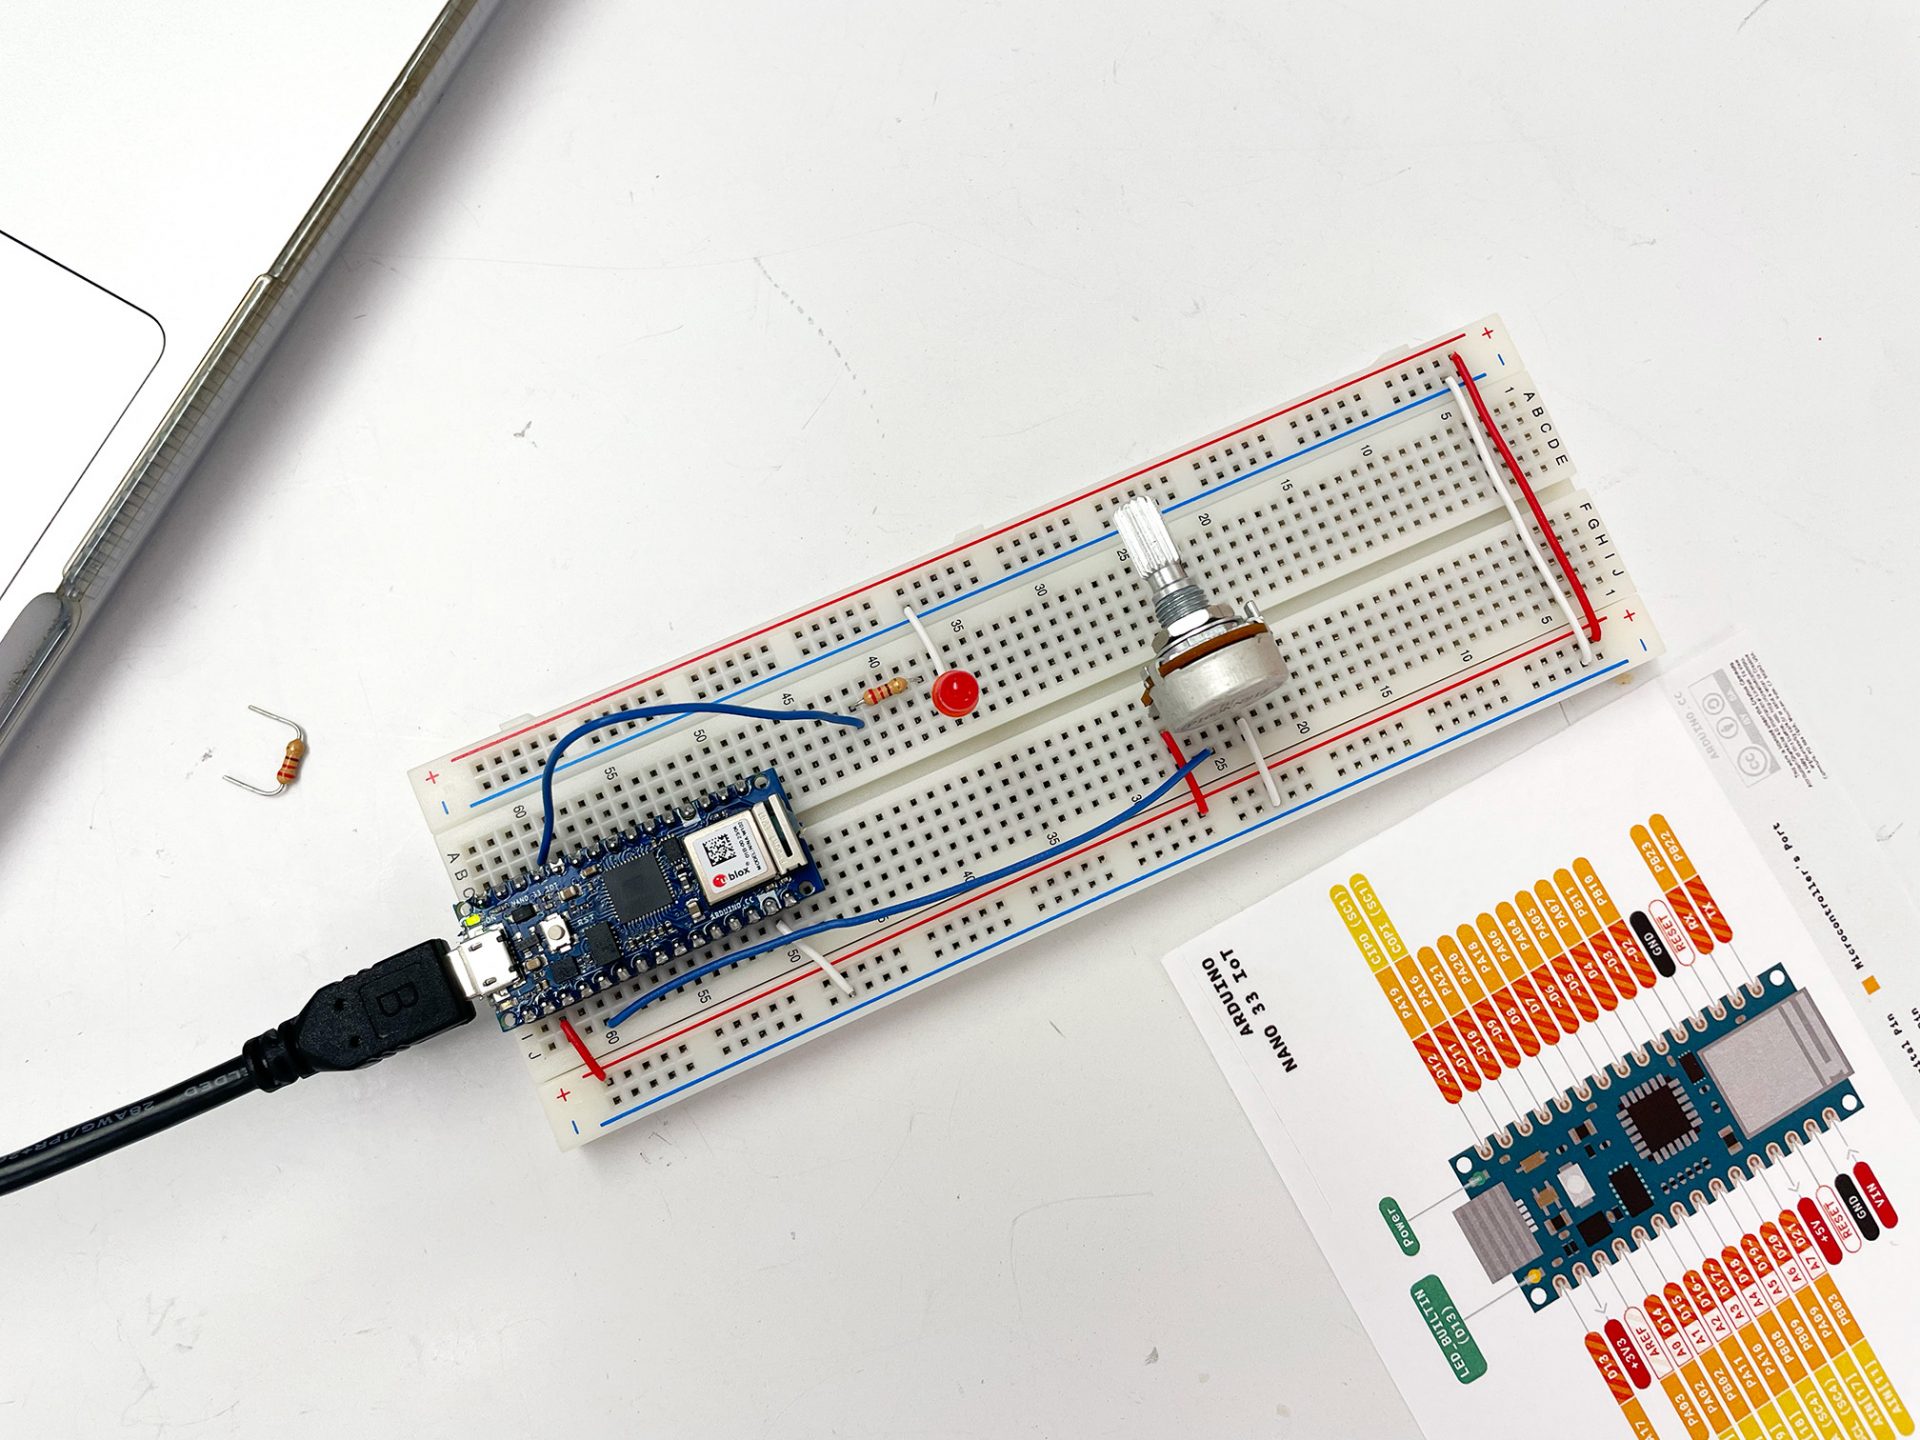
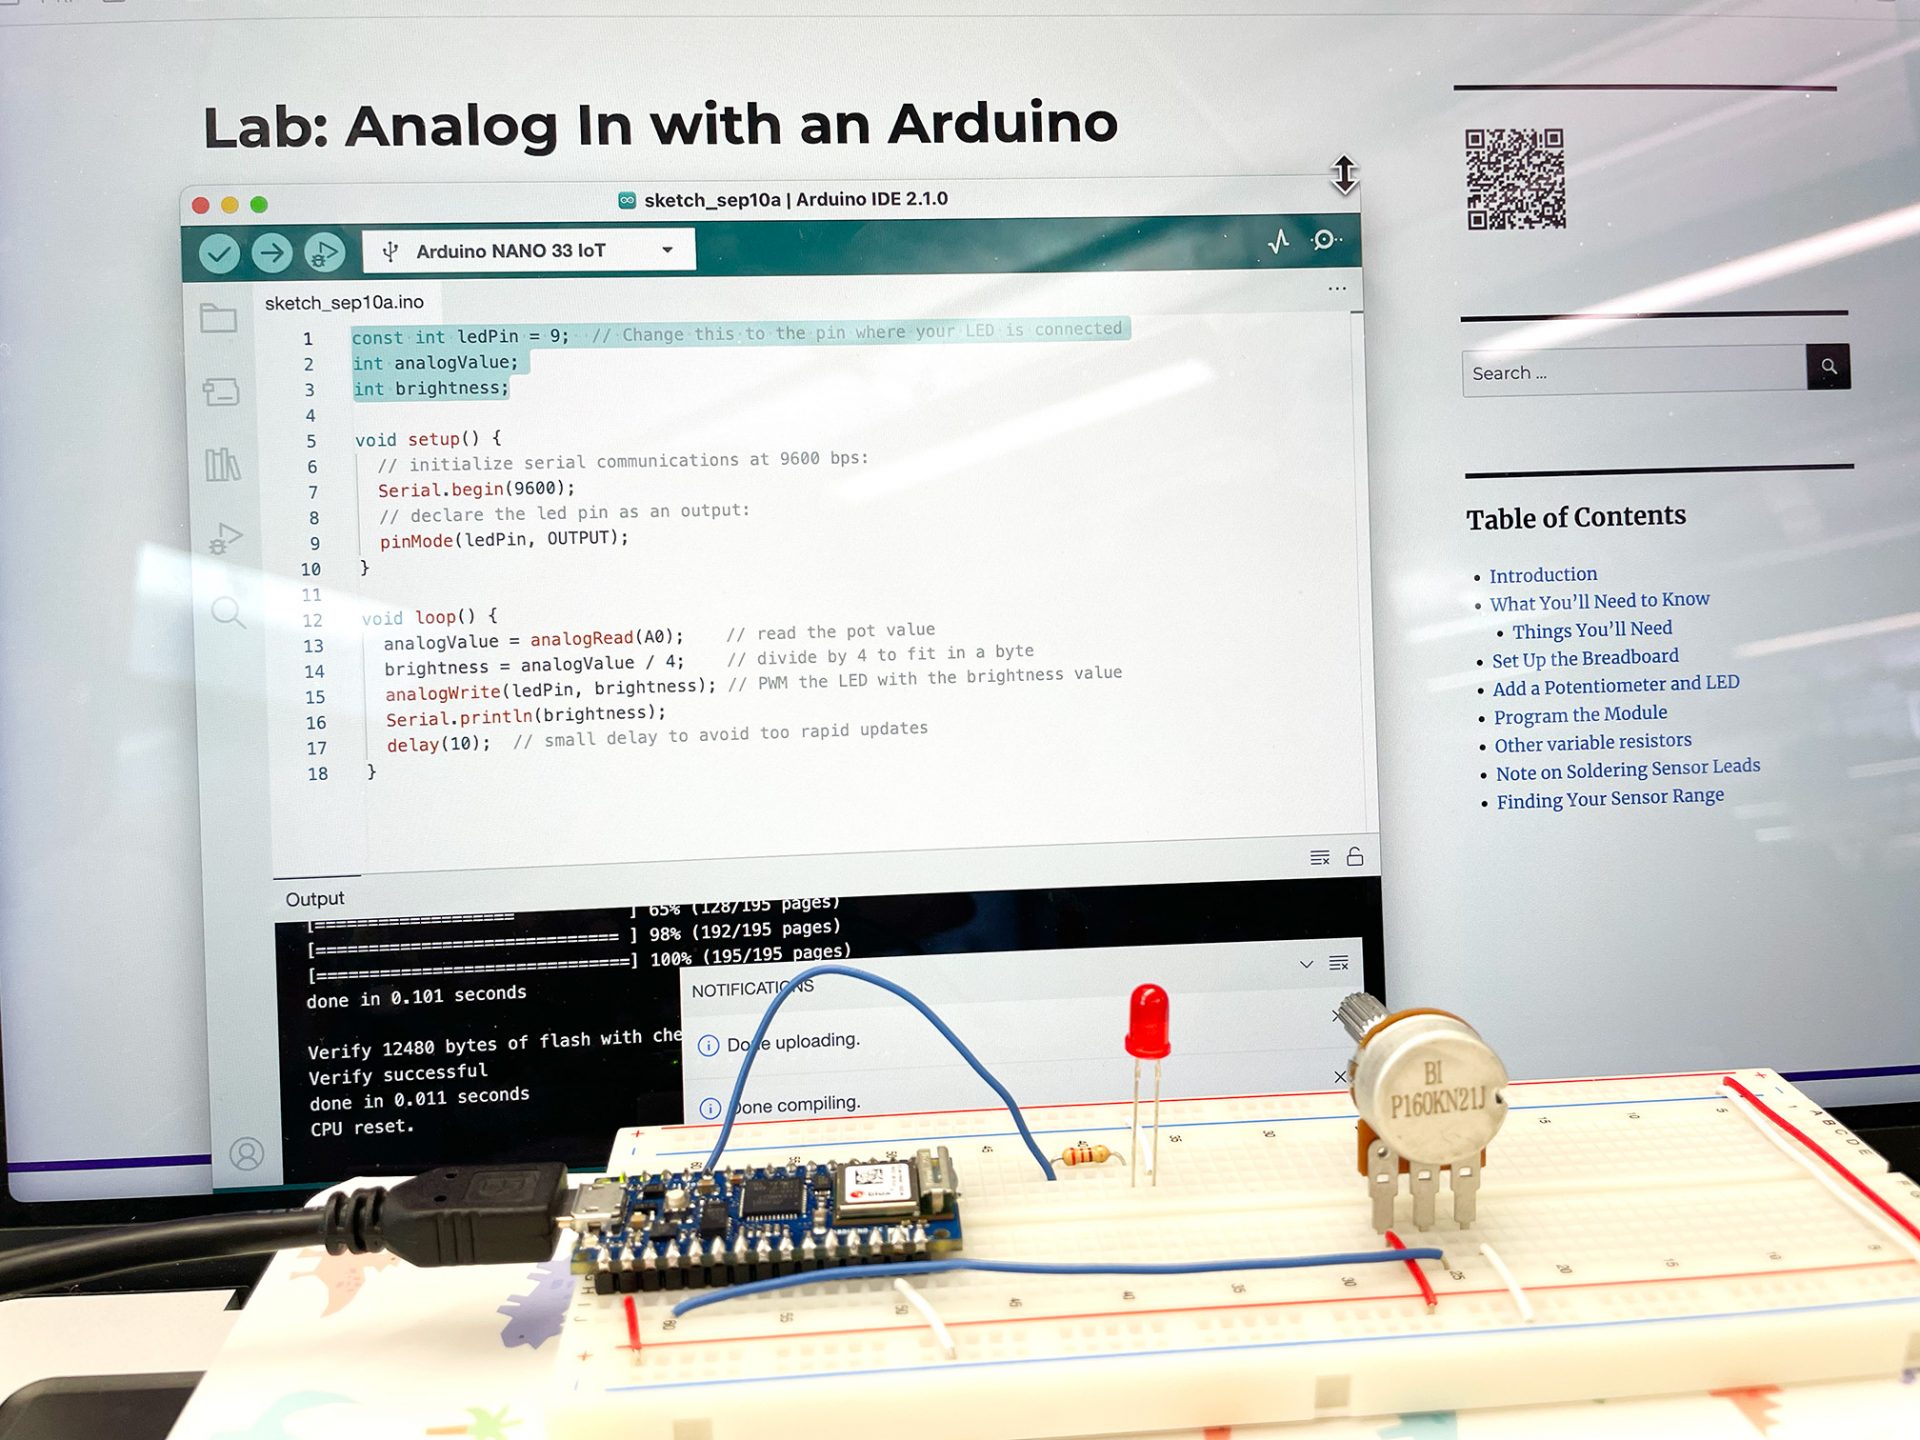
Using a potentiometer as an analog input to control the brightness of an LED
Count Button Presses
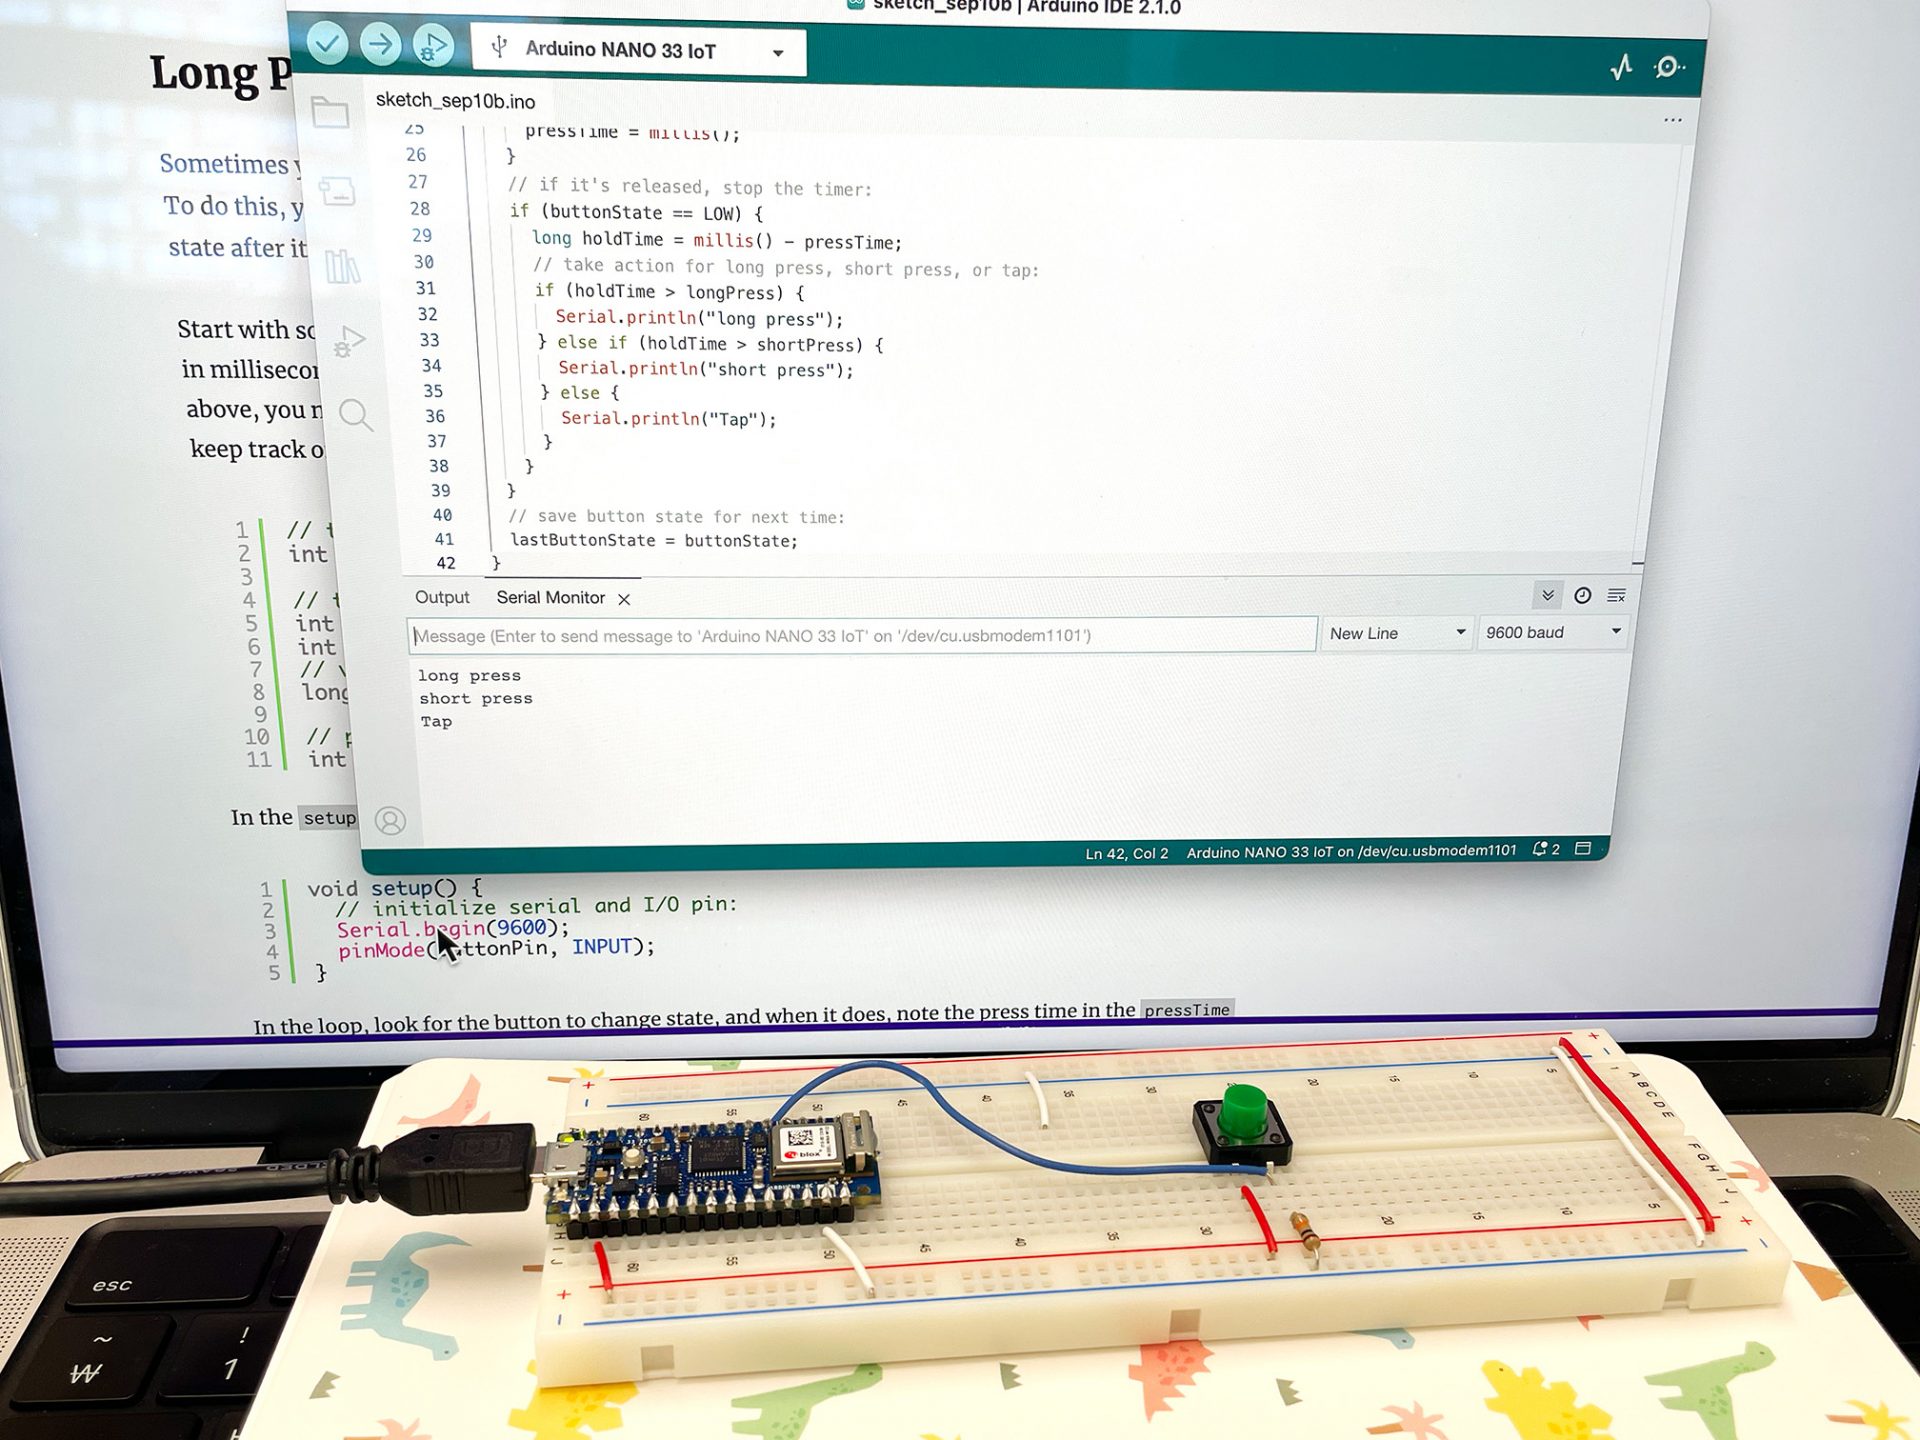
Long Press, Short Press
Save the state of the Button in buttonState and the time the button was held in holdTime. Then println “long press / short press / Tap” to the Serial Monitor every time the button is pressed for each stored time length.
Analog Sensor Threshold Detection
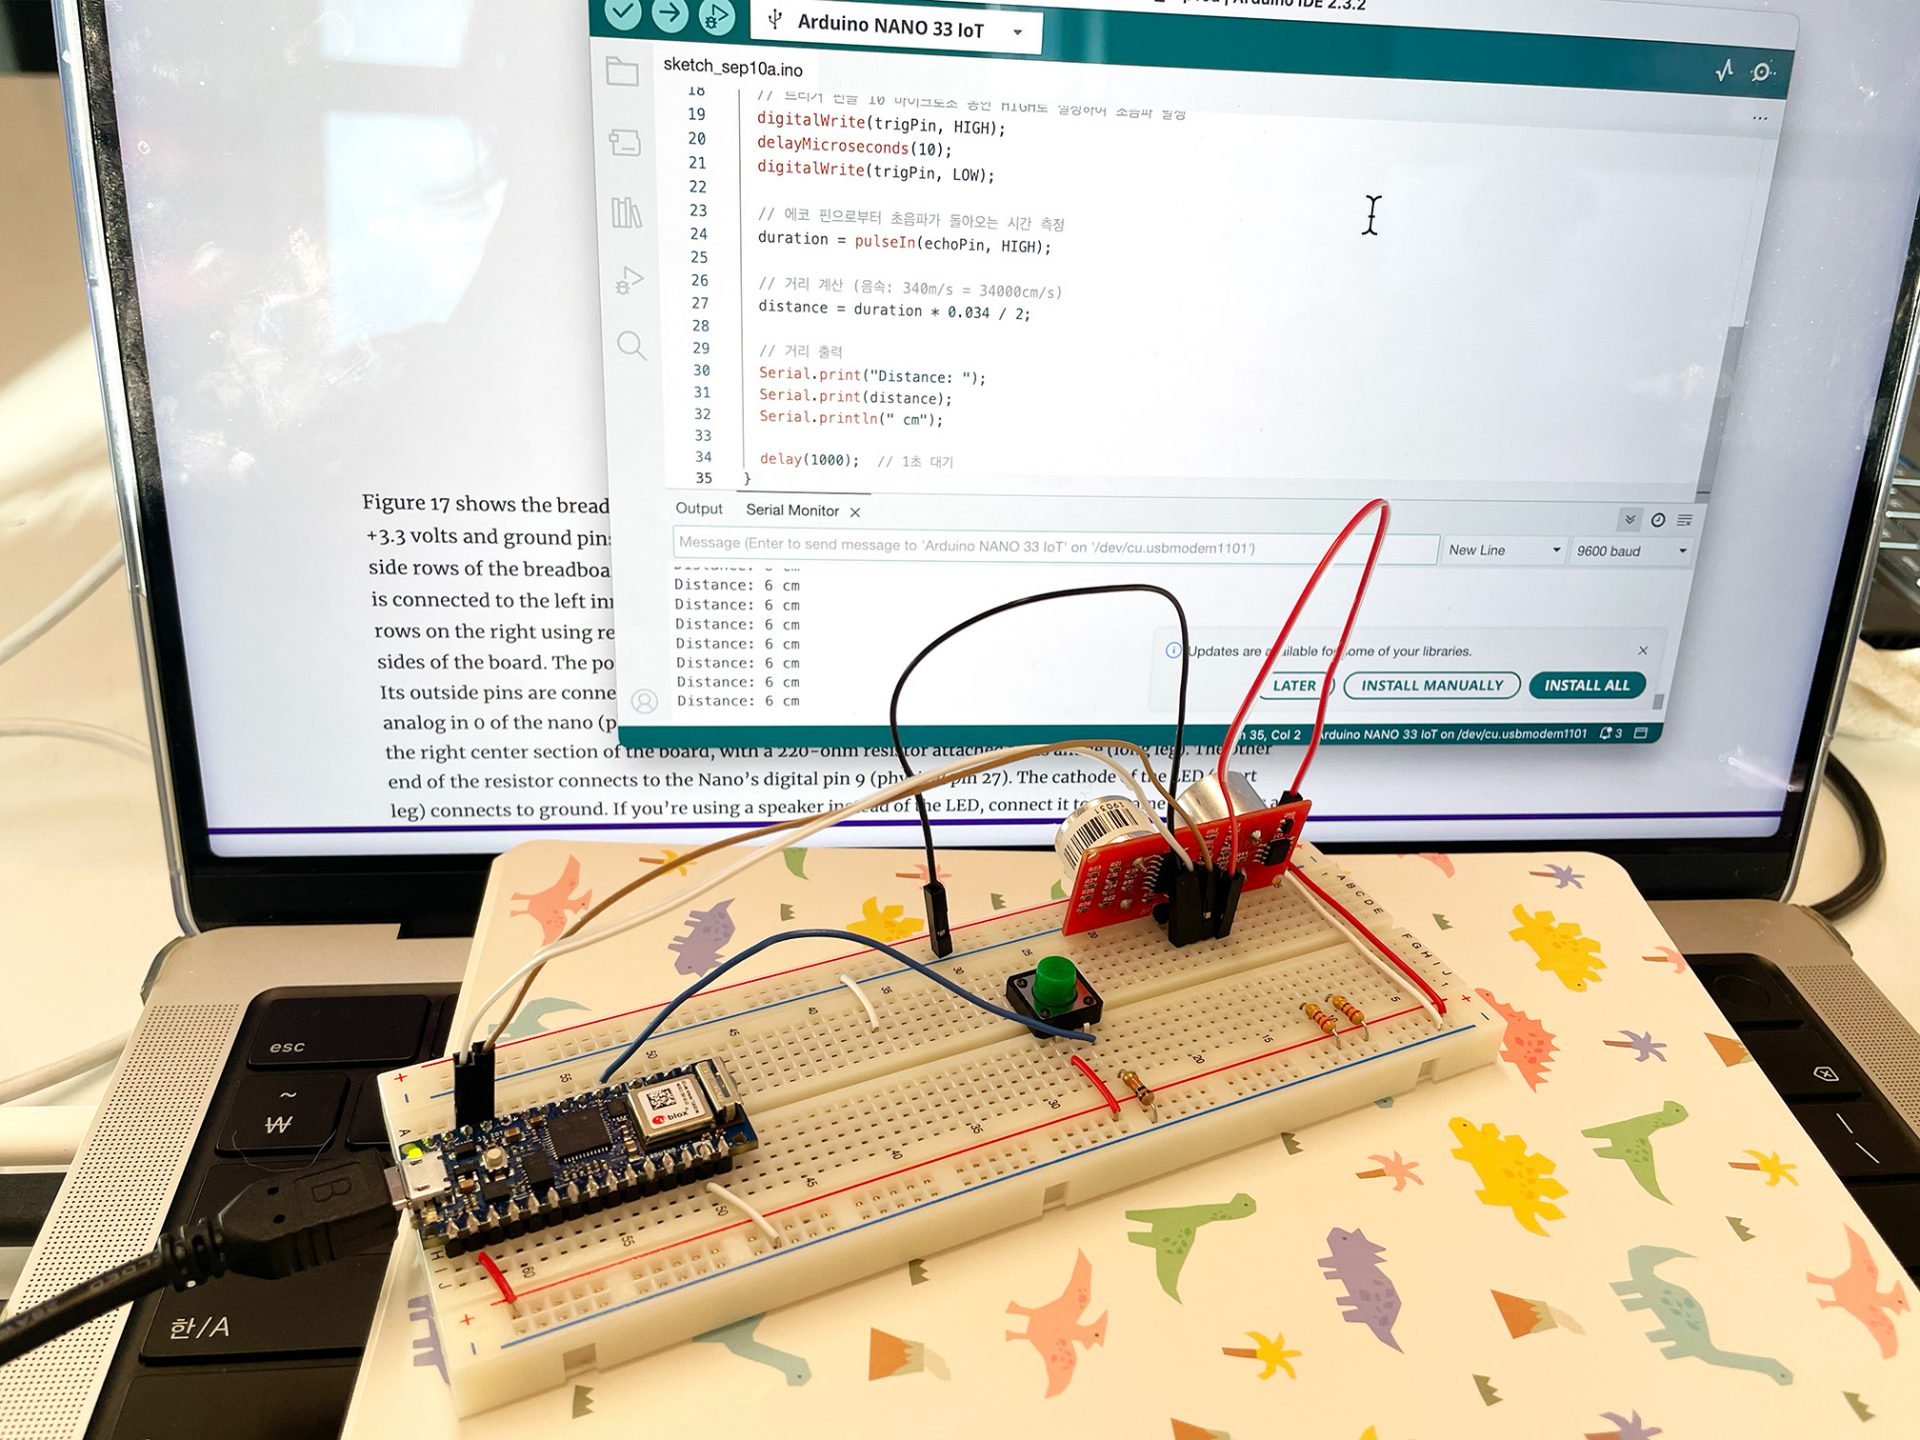
Additional Lab: Serial print with Ultrasonic sensor
Use an ultrasonic sensor as input to measure the distance to an object in front of you. Calculate the distance by calculating the speed of sound through duration*0.034/2. Then println the distance in cm to the Serial Monitor.